elk集群的部署
2022-10-13
8 min read
一、.安装部署elasticsearch
1.版本选择
选择7.8的版本
wget https://artifacts.elastic.co/downloads/elasticsearch/elasticsearch-7.8.0-x86_64.rpm
yum install -y elasticsearch-7.8.0-x86_64.rpm
1.2编辑配置文件
vim /etc/elasticsearch/elasticsearch.yml
# ======================== Elasticsearch Configuration =========================
#
# NOTE: Elasticsearch comes with reasonable defaults for most settings.
#       Before you set out to tweak and tune the configuration, make sure you
#       understand what are you trying to accomplish and the consequences.
#
# The primary way of configuring a node is via this file. This template lists
# the most important settings you may want to configure for a production cluster.
#
# Please consult the documentation for further information on configuration options:
# https://www.elastic.co/guide/en/elasticsearch/reference/index.html
#
# ---------------------------------- Cluster -----------------------------------
#
# Use a descriptive name for your cluster:
#
cluster.name: my-application #集群名称
#
# ------------------------------------ Node ------------------------------------
#
# Use a descriptive name for the node:
#
node.name: node-1 #节点名称
#
# Add custom attributes to the node:
#
#node.attr.rack: r1
#
# ----------------------------------- Paths ------------------------------------
#
# Path to directory where to store the data (separate multiple locations by comma):
#
path.data: /var/lib/elasticsearch
#
# Path to log files:
#
path.logs: /var/log/elasticsearch
#
# ----------------------------------- Memory -----------------------------------
#
# Lock the memory on startup:
#
#bootstrap.memory_lock: true
#
# Make sure that the heap size is set to about half the memory available
# on the system and that the owner of the process is allowed to use this
# limit.
#
# Elasticsearch performs poorly when the system is swapping the memory.
#
# ---------------------------------- Network -----------------------------------
#
# Set the bind address to a specific IP (IPv4 or IPv6):
#
network.host: 0.0.0.0 #节点ip
#
# Set a custom port for HTTP:
#
#http.port: 9200
#
# For more information, consult the network module documentation.
#
# --------------------------------- Discovery ----------------------------------
#
# Pass an initial list of hosts to perform discovery when this node is started:
# The default list of hosts is ["127.0.0.1", "[::1]"]
# 发现集群的ip列表
discovery.seed_hosts: ["192.168.234.201", "192.168.234.202","192.168.234.203"]
#
# Bootstrap the cluster using an initial set of master-eligible nodes:
# 集群初始化主节点的机器
cluster.initial_master_nodes: ["192.168.234.201", "192.168.234.202","192.168.234.203"]
#
# For more information, consult the discovery and cluster formation module documentation.
#
# ---------------------------------- Gateway -----------------------------------
#
# Block initial recovery after a full cluster restart until N nodes are started:
#
#gateway.recover_after_nodes: 3
#
# For more information, consult the gateway module documentation.
#
# ---------------------------------- Various -----------------------------------
#
# Require explicit names when deleting indices:
#
action.destructive_requires_name: true
1.3启动
sudo systemctl daemon-reload
sudo systemctl enable elasticsearch.service
sudo systemctl start elasticsearch.service.
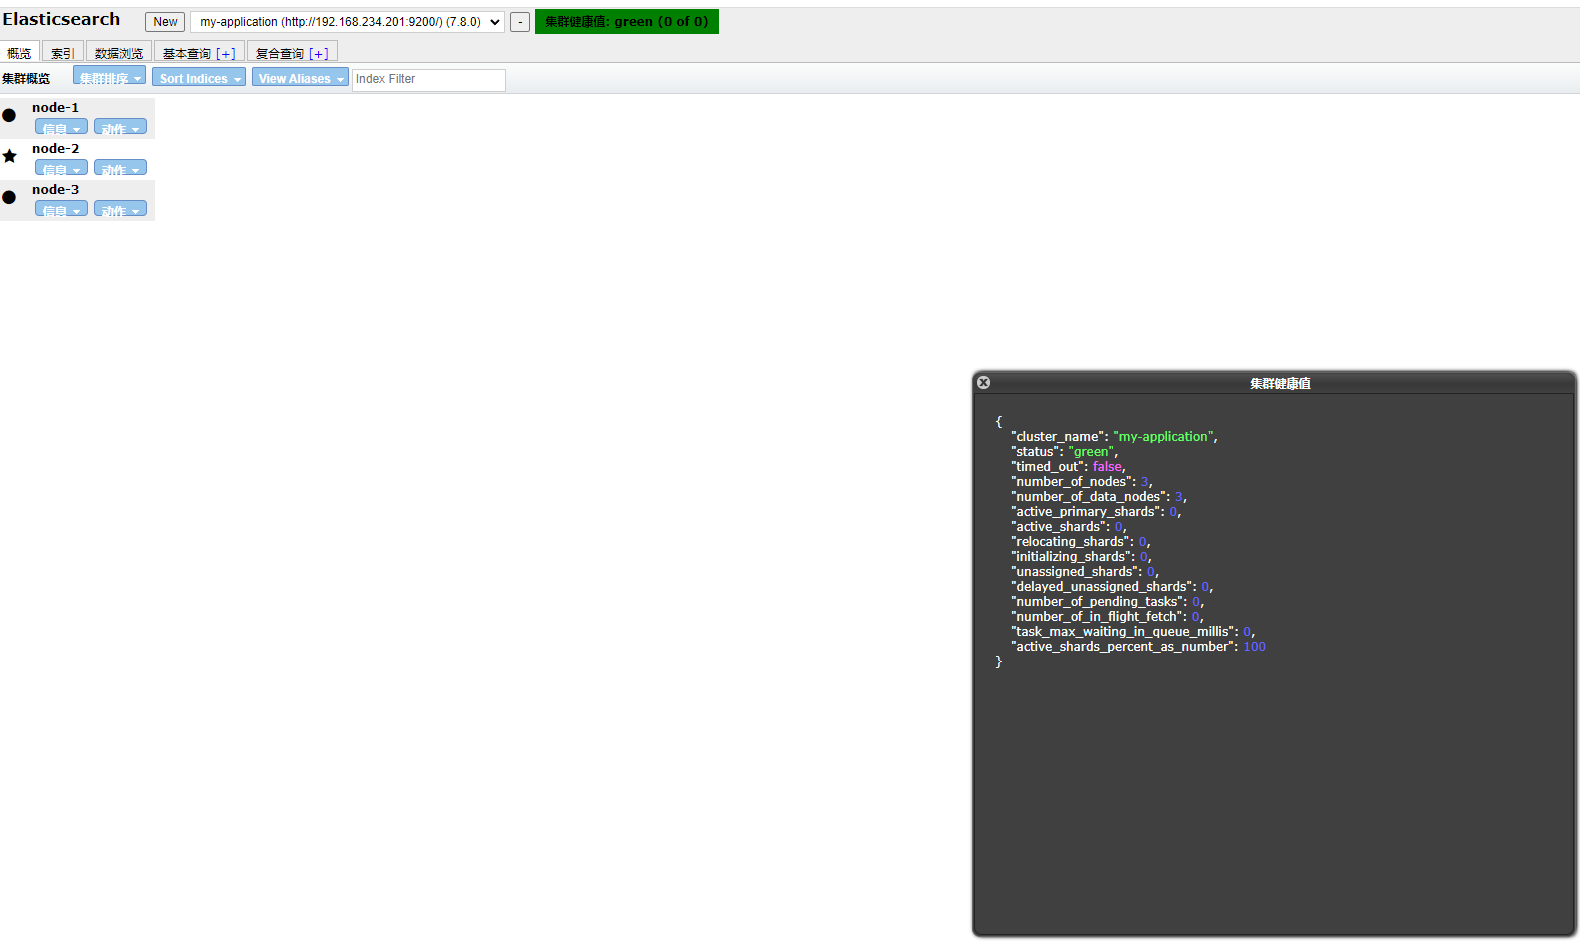
1.4验证


二.安装zookeeper
2.1安装zookeeper
下载
wget http://archive.apache.org/dist/zookeeper/stable/apache-zookeeper-3.6.3-bin.tar.gz
tar -zxvf apache-zookeeper-3.6.3-bin.tar.gz
mv apache-zookeeper-3.6.3-bin zookeeper
2.2配置zookeeper
配置1
配置数据目录
cd ./zookeeper/conf
cp zoo_sample.cfg zoo.cfg
mkdir data
配置2
编辑zoo.cfg
vim zoo.cfg
# The number of milliseconds of each tick
tickTime=2000
# The number of ticks that the initial
# synchronization phase can take
initLimit=10
# The number of ticks that can pass between
# sending a request and getting an acknowledgement
syncLimit=5
# the directory where the snapshot is stored.
# do not use /tmp for storage, /tmp here is just
# example sakes.
dataDir=/data/zookeeper/conf/data
# the port at which the clients will connect
clientPort=2181
# the maximum number of client connections.
# increase this if you need to handle more clients
#maxClientCnxns=60
#
# Be sure to read the maintenance section of the
# administrator guide before turning on autopurge.
#
# http://zookeeper.apache.org/doc/current/zookeeperAdmin.html#sc_maintenance
#
# The number of snapshots to retain in dataDir
#autopurge.snapRetainCount=3
# Purge task interval in hours
# Set to "0" to disable auto purge feature
#autopurge.purgeInterval=1

## Metrics Providers
#
# https://prometheus.io Metrics Exporter
#metricsProvider.className=org.apache.zookeeper.metrics.prometheus.PrometheusMetricsProvider
#metricsProvider.httpPort=7000
#metricsProvider.exportJvmInfo=true
server.1=192.168.234.201:2188:2888
server.2=192.168.234.202:2188:2888
server.3=192.168.234.203:2188:2888
配置3
集群所需的ID序号
cd data/
echo "1" > myid
#zookeeper 2-3依次
echo "2" > myid
echo "3" > myid
2.3启动zookeeper
编写启动脚本
vim zk.sh
case $1 in
"start"){
        for i in 192.168.234.201 192.168.234.202 192.168.234.203
        do
                 echo -------------------------------- $i zookeeper 启动 ---------------------------
                ssh $i "/data/zookeeper/bin/zkServer.sh start"
        done
}
;;
"stop"){
        for i in 192.168.234.201 192.168.234.202 192.168.234.203
        do
                echo -------------------------------- $i zookeeper 停止 ---------------------------
                ssh $i "/data/zookeeper/bin/zkServer.sh start"
        done
}
;;
"status"){
        for i in 192.168.234.201 192.168.234.202 192.168.234.203
        do
                echo -------------------------------- $i zookeeper 状态 ---------------------------
                ssh $i "/data/zookeeper/bin/zkServer.sh start"
        done
}
;;
esac
启动集群
./zk.sh start
脚本命令说明
# 启动集群命令
./zk.sh start
# 停止集群命令
./zk.sh stop
# 查看集群状态命令
./zk.sh status
2.4连接集群
# 连接zookeeper集群
cd /opt/module/zookeeper
./bin/zkCli.sh

三、安装kafka
3.1下载解压
下载解压
cd /data
wget https://archive.apache.org/dist/kafka/2.6.0/kafka_2.13-2.6.0.tgz
tar -zxvf kafka_2.13-2.6.0.tgz
mv kafka_2.13-2.6.0 kafka
3.2配置kafka
配置1
创建kafka的数据目录
cd kafka
mkdir kafka-logs
配置2
修改配置文件
vim config/server.properties
#修改要定义的如下参数
#kafka 192.168.234.202-203依次修改即可
#其他集群节点都需要修改配置文件server.properties中的 broker.id 和listeners 参数。
broker.id=0
listeners=PLAINTEXT://192.168.234.201:9092
log.dirs=/data/kafka/kafka-logs
zookeeper.connect=192.168.234.201:2181,192.168.234.202:2181,192.168.234.203:2181
3.3编写启动脚本
case $1 in
"start"){
        for i in 192.168.234.201 192.168.234.202 192.168.234.203
        do
                 echo -------------------------------- $i kafka 启动 ---------------------------
                ssh $i "source /etc/profile;/data/kafka/bin/kafka-server-start.sh -daemon /data/kafka/config/server.properties"
        done
}
;;
"stop"){
        for i in 192.168.234.201 192.168.234.202 192.168.234.203
        do
                echo -------------------------------- $i kafka 停止 ---------------------------
                ssh $i "/data/kafka/bin/kafka-server-stop.sh"
        done
}
;;
esac
3.4启动kafka
./kafka-cluster.sh start
脚本命令说明
启动kafka集群命令
./kafka-cluster.sh start

停止kafka集群命令
./kafka-cluster.sh stop
3.5kafka简单测试
#查看topic 列表:
./kafka-topics.sh --list --zookeeper 192.168.234.201:2181,192.168.234.202:2181,192.168.234.203:2181